How to Install
The Achievements and Rewards Module is an exciting addition to your Sngine-powered community, designed to incentivize engagement and recognize user contributions. This module allows you to set up customizable badges and rewards that users can earn as they participate in your community, adding a gamification layer that encourages continued activity and loyalty.
Key Installation Steps:
-
Administrative Access:
Ensure you are logged in as an administrator. Only users with administrative privileges can install or update system modules. -
Environment Setup:
The module integrates seamlessly with Sngine by using the platform's bootloader. This ensures that all system configurations, including the database connection, are loaded before the installation process begins. -
Database Schema Creation and Update:
The installation script creates the required database tables—typicallybadgesandusers_badges—if they don't already exist. If these tables are already in place, the script can update them to match the latest schema requirements. It also populates these tables with sample data, ensuring you have a working baseline to test and further customize the module. -
Error Handling and Confirmation:
The installation script includes mechanisms to handle common issues, such as duplicate entries or foreign key conflicts. Upon successful installation, you'll receive a clear confirmation message; if any errors occur, detailed error messages will be displayed for troubleshooting. -
Customization and Integration:
After installation, you can further customize the badges, rewards, and their associated criteria according to your community's needs. This module integrates naturally into the Sngine framework, making it straightforward to extend or modify functionalities as your platform grows.
By following these steps, you can quickly set up the Achievements and Rewards Module and start rewarding your community members for their engagement. Whether you’re looking to boost user interaction or celebrate milestones, this module offers a robust solution tailored for Sngine communities. So let's get started.
Step 1: Upload Files and install database tables
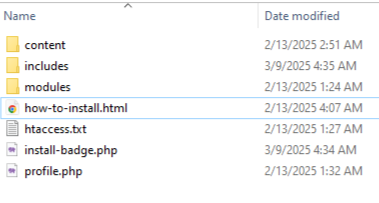
Download your zip folder and upload it to your root directory and visit yousite.com/install-badge.php
Click on Install/Update Module once you finish the install, delete or rename install-badge.php
Step 2: Edit Files
Open .htaccess file a and add
# Achivements and Rewards Module for Sngine
RewriteRule ^leaderboard/?$ modules/badges/index.php [L,QSA]
RewriteRule ^rewards/?$ modules/badges/rewards.php [L,QSA]
RewriteRule ^mybadges/?$ modules/badges/mybadges.php [L,QSA]
RewriteRule ^gifts/?$ modules/badges/gifts.php [L,QSA]

# Achivements and Rewards Module for Sngine ADMIN
RewriteRule ^leaderboard/admin/?$ modules/badges/admin.php [L,QSA]
Now open
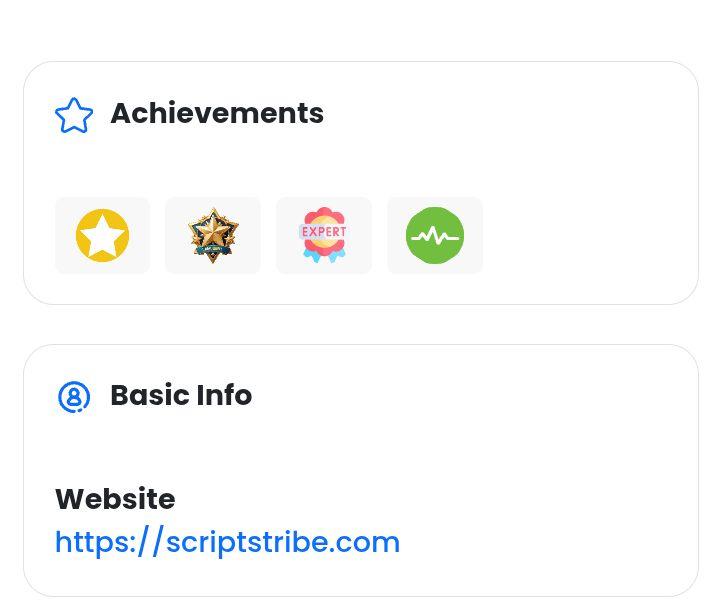
content/themes/youTheme/templates/profile.tpl and add this code whereever you want to display the badges block inthe user profile, I have it above basic info
{include file="badges/user_badges.tpl" user_id=$profile_user.user_id}Open content/themes/youTheme/templates/_user_menu.tpl and look for
{if $user->_is_admin}and before that add
 <a class="dropdown-item" href="{$system['system_url']}/leaderboard">
      {include file='__svg_icons.tpl' icon="trophy" class="mr10" width="20px" height="20px"}
      {__("Leaderboard")}
    </a>
	 <a class="dropdown-item" href="{$system['system_url']}/mybadges">
      {include file='__svg_icons.tpl' icon="trophy" class="mr10" width="20px" height="20px"}
      {__("My Badges")}
    </a>
Look for
{if $user->_is_admin}and after that add
    <div class="dropdown-divider"></div>
	 <a class="dropdown-item" href="{$system['system_url']}/leaderboard/admin">
      {include file='__svg_icons.tpl' icon="badge" class="mr10" width="20px" height="20px"}
      {__("Badges Admin")}
    </a>
// Commands to create Cron
//0 * * * * php /var/www/vhosts/yourhostname/yousite.com/modules/badges/cron_badges.php
//php /home/yourusername/public_html/modules/badges/cron_badges.phpStep 4: Edit class-user.php to check user points and eliminate need to add cron
Open class-user.php and look for
 /* log the points */
        $db->query(sprintf("INSERT INTO log_points (user_id, node_id, node_type, points, time) VALUES (%s, %s, %s, %s, %s)", secure($user_id, 'int'), secure($node_id, 'int'), secure($node_type), secure($points_per_node, 'float'), secure(date('Y-m-d H:i:s'))));
        break;
After that add
 /* Check for badge unlocks Start */
    $user_points_query = $db->query("SELECT user_points FROM users WHERE user_id = {$user_id}");
    $user_data = $user_points_query->fetch_assoc();
    $user_points = $user_data['user_points'];

    $badgesQuery = $db->query("SELECT * FROM badges WHERE points_required <= {$user_points}");

    while ($badge = $badgesQuery->fetch_assoc()) {
        $badge_id = $badge['badge_id'];

        // Check if the user already has this badge
        $check = $db->query("SELECT COUNT(*) as count FROM users_badges WHERE user_id = {$user_id} AND badge_id = {$badge_id}");
        $check_result = $check->fetch_assoc();

        if ($check_result['count'] == 0) {
            // Assign the badge
            $db->query("INSERT INTO users_badges (user_id, badge_id, awarded_at) VALUES ({$user_id}, {$badge_id}, NOW())");

            // Trigger real-time notification
            $db->query(sprintf(
                "INSERT INTO notifications (to_user_id, from_user_id, action, node_type, node_url, time) VALUES (%s, 0, 'badge_awarded', 'badge', 'mybadges', NOW())",
                secure($user_id, 'int')
            ));
        }
    }
    break;
    /* Check for badge unlocks End*/
Step 6: This step allow notification to popup
Open _head.tpl
and add (or add in your favorite place, at this point I assume you now how to include css and js files)
  <script src="https://code.jquery.com/jquery-3.6.0.min.js"></script>
  <script type="text/javascript" src="{$system['system_url']}/content/themes/{$system['theme']}/js/badges.js"></script>
  <link rel="stylesheet" href="{$system['system_url']}/content/themes/{$system['theme']}/css/badges.css">
Step 5: Change default settings
I left some default settings go give you an idea of what to do, this addon is very simple, you will understand when you play with the admin area.
Visit yoursite.com/leaderboard/admin to change this settings
PS: I created my own admin area to avoid touching the core files much.
when adding images url upload you images or new badges to /content/uploads/badges folder
it's 3:57 AM and i am creating this so if I forgot anything, talk to me in the chat at https://scriptstribe.com
In the next few days I will be working on make this look nice on elengine and Xngine theme and once I am done I will update the download file, in the mean while, if you want to do it yourself or wait is up to you. Remember! custom themes is not part of the job but I am willing to do this to help.
Changelog: Some bug fixes
I was able to add, edit and delete badges with no errors
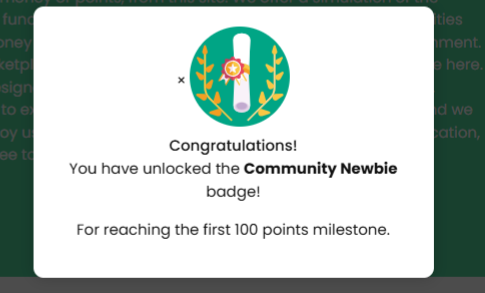
Added: New badge rewarded popup notifying users of the new badge earned
Added auto-check for points so there is not need to run cron.
You are done, now go play around
Thank you for your order


